

Our first steps using this visual programming library will be drawing basic shapes to our screen. By typing the name of a shape function followed by parentheses ( ), and whatever data it needs inside those parentheses in order to work, we are able to call that shape to our canvas.
Although the programming canvas for your p5.js sketch is blank until you write some code, it helps to imagine a grid originating from the top left corner of your canvas (0,0) that increases from left to right across the X axis, and top to bottom along the Y axis.
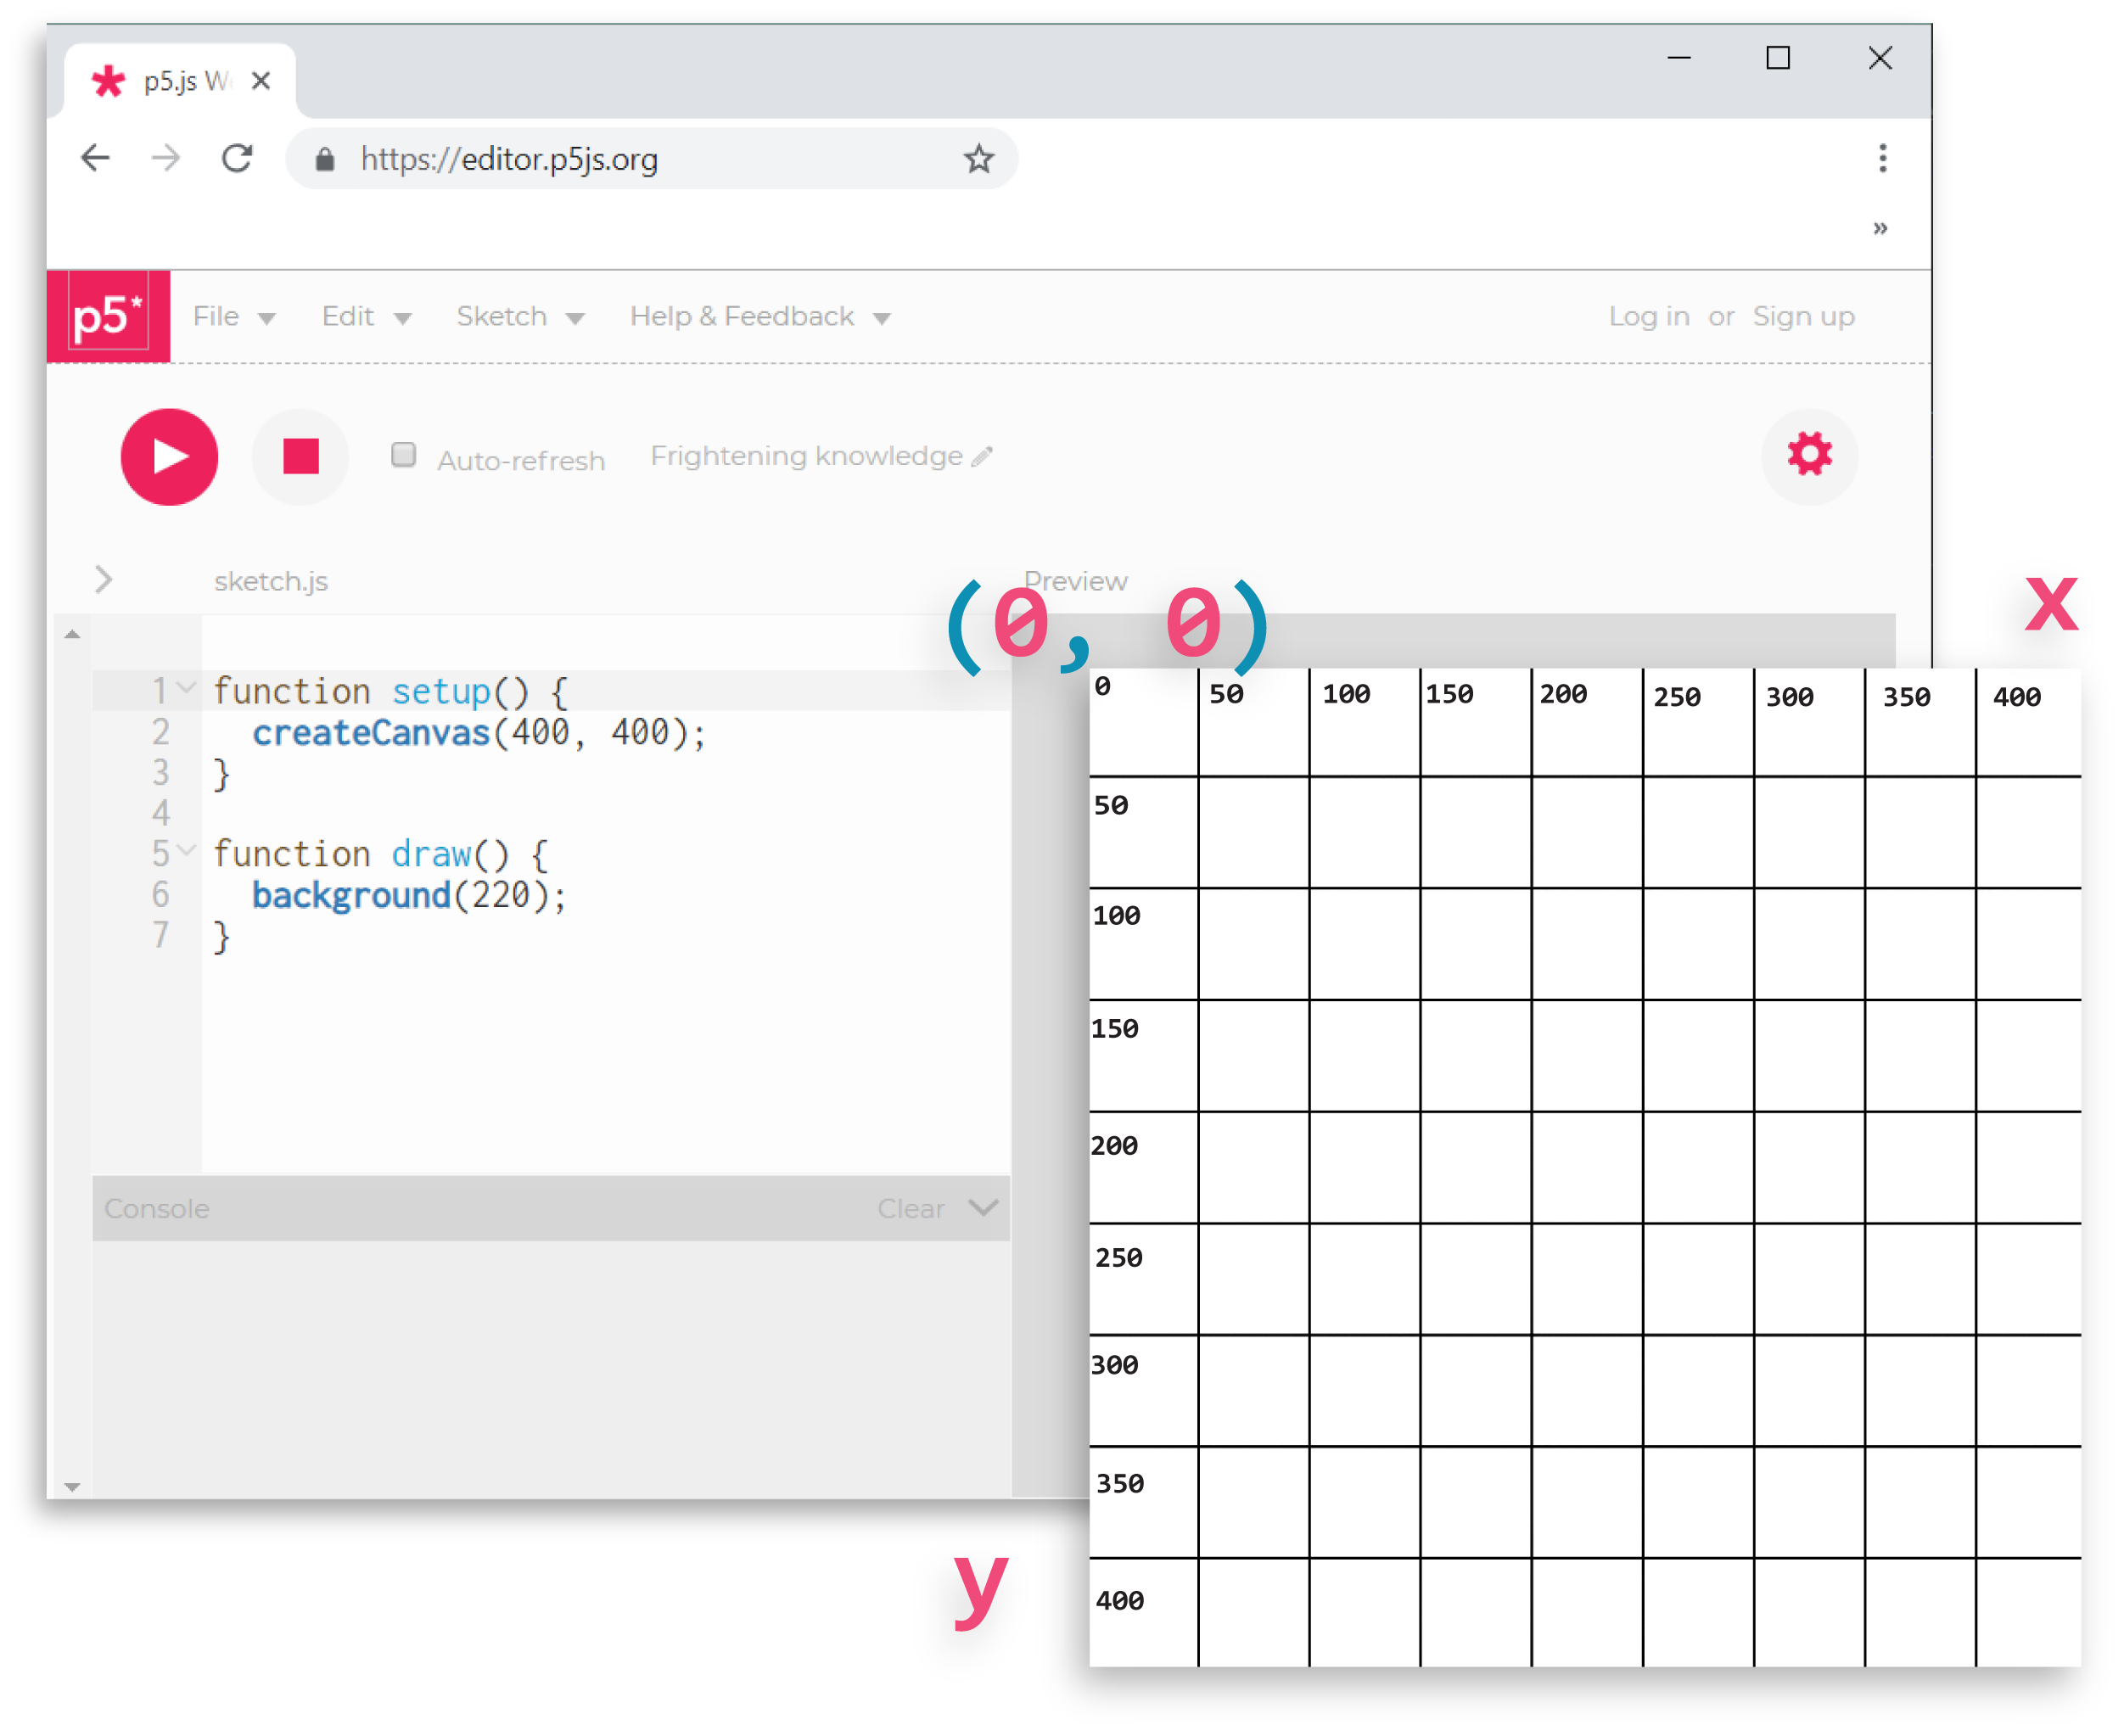
Each shape used in a p5.js sketch exists upon the (invisible) X, Y coordinate grid of your programming canvas (or HTML canvas, but more on that later).
Check out some basic shape p5.js shape functions below. Notice how their syntax is very similar even if the input they require inside the parentheses varies depending on what shape you're attempting to create.


point() and line() are very similar functions that are described using x, y coordinates from your programming canvas.


Although the number of parameters required for both the triangle() and quad() shape function can be intimidating to make sense of at first glance, just think of them as an extension of the line() function where you're plotting coordinates for each starting and ending point.

When you provide an x, and y parameter for an ellipse() function call, you're describing the center point of that ellipse. The width and height parameters of the ellipse() describe the amount of pixels it takes up on your canvas from that central x, y starting point.

When you provide an x, and y parameter for a rect() function call, you're describing the corner point of that rectangle. The width and height parameters of the rect() describe the amount of pixels it extends across the x-axis and down the y-axis-- from that top left x, y starting point.
TIP: Always make sure you're calling your shape functions inside the square brackets of either function setup() {} or function draw() {}.

Otherwise, your p5.js sketch may not work properly. Much more on this later.

By calling multiple shape functions in succession, each with their own set of parameters, we are able to orchestrate basic illustrations that our browser renders to an HTML5 canvas.
In Closing...
After you're able to successfully call shapes to your screen, try to plan out a basic illustration that you can create by combining basic p5.js shape functions. I find it helps to base it off a tangible, real life object like a vehicle, but I've had students adapt this project to include fantastical unicorns, aeroplanes and giant otters. Anything else that could serve as your dream mode of transport that is even slightly on the verge of representational, will serve as an excellent first project and one we can revisit and adapt to later lessons.

Feel free to use my example if you get stuck. Notice that the order of your shape function calls do, in fact, matter. If the triangle() and/or the quad() function are confusing or intimidating, feel free to set those aside for the next project as they do take a bit more focus to execute correctly. Note that you can also use double forward slashes // to comment out a line of code. Anything with a // in front of it will not be interpreted by your browser and therefore will be ignored by your p5.js project entirely. This is a great way to not only temporarily 'disable' a line of code, but also leave yourself notes!
Up next, we introduce color and design functions that can be used to describe the style of each shape in our p5.js illustrations.